Weekly Review #24
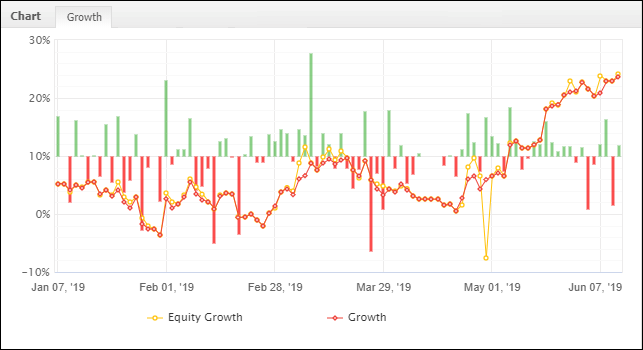
Table of Contents
Forex Trading Review – Week 24
Another solid trading week. I did not make much money, but I am still on track for a profitable second quarter and a profitable year.
There were no trading opportunities for me until Thursday, but then they all came at once.
I had five trades on Thursday and two on Friday. Overall I am happy with the results, ending the week with roughly a +2% gain to my equity and (barely) pushing to all-time-highs in my equity curve.
10th June – 15th June
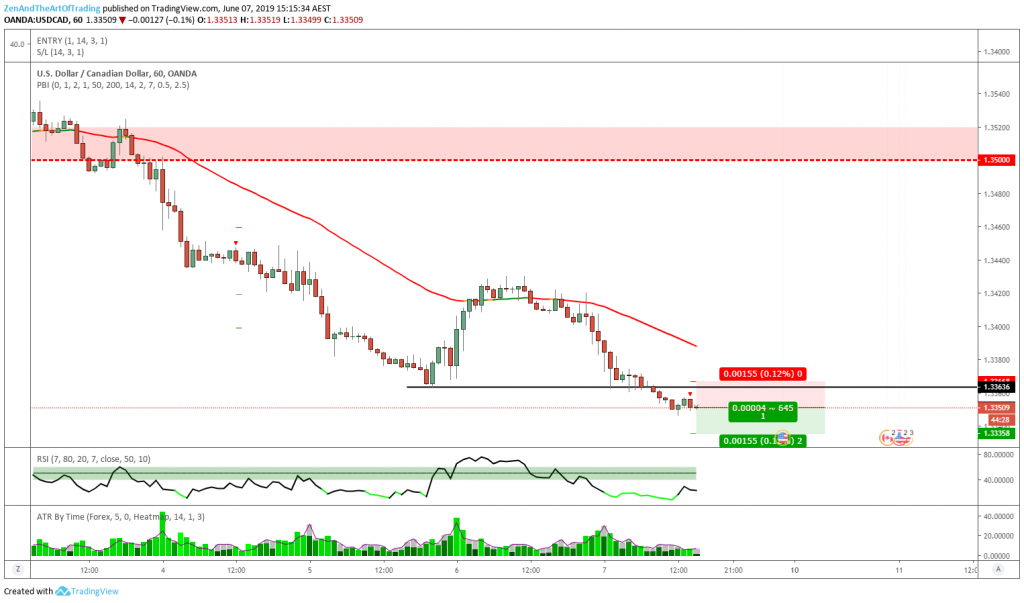
Trade #99
| Market | USD/CAD |
| Date & Time | 7/6/19 9:00 AM |
| Daily Trend | Bearish |
| Timeframe | 1HR |
| Strategy | Pullback |
| Result | +2.15% |
| Verdict | Good Trade |
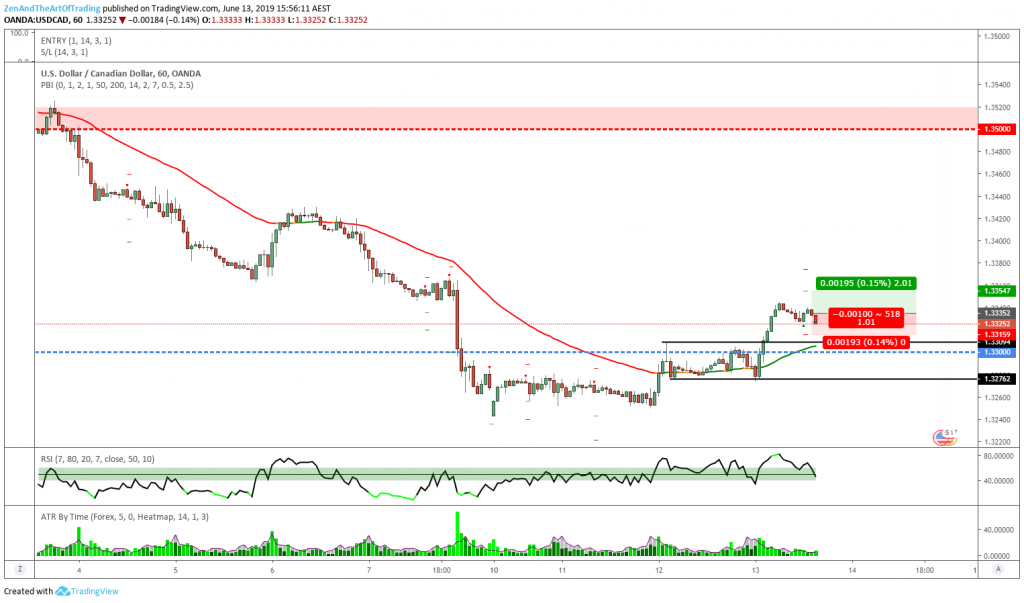
Trade #99 – Before 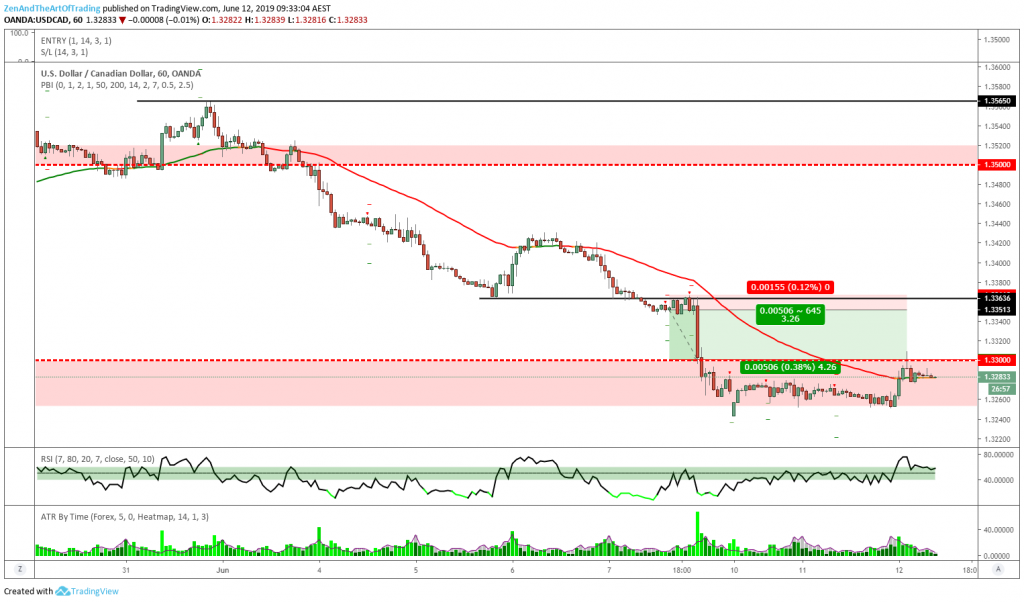
Trade #99 – After
Reflection:
This was a trade from last week. A two-target winner on USD/CAD.
In hindsight I should have probably taken my second position off during the long period of consolidation within the red zone, but I decided to let the trade play out for one more night.
By the next morning my trailing stop was tagged and I came away with about half as much profit as I feel I should have on this trade. The red zone is a major level of Daily support and my rules say that I can use discretion to exit trades within such zones.
I would have taken my profits after the final bullish engulfing candle at the low of the zone, but I went to bed an hour before that occurred so I unfortunately did not make as much money on this trade as I could have.
But technically I followed my system’s rules to the letter and my trailing stop ensured that I did not come away with nothing, so this was a good trade.
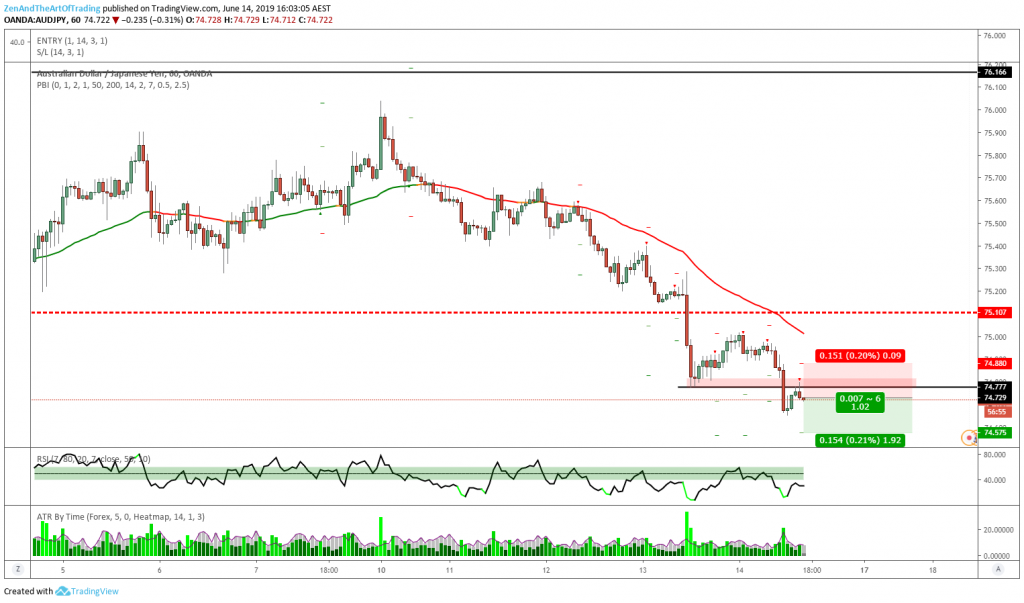
Trade #100
| Market | AUD/JPY |
| Date & Time | 13/6/19 9:00 AM |
| Daily Trend | Bearish |
| Timeframe | 1HR |
| Strategy | Pullback |
| Result | -1.02% |
| Verdict | Good Trade |
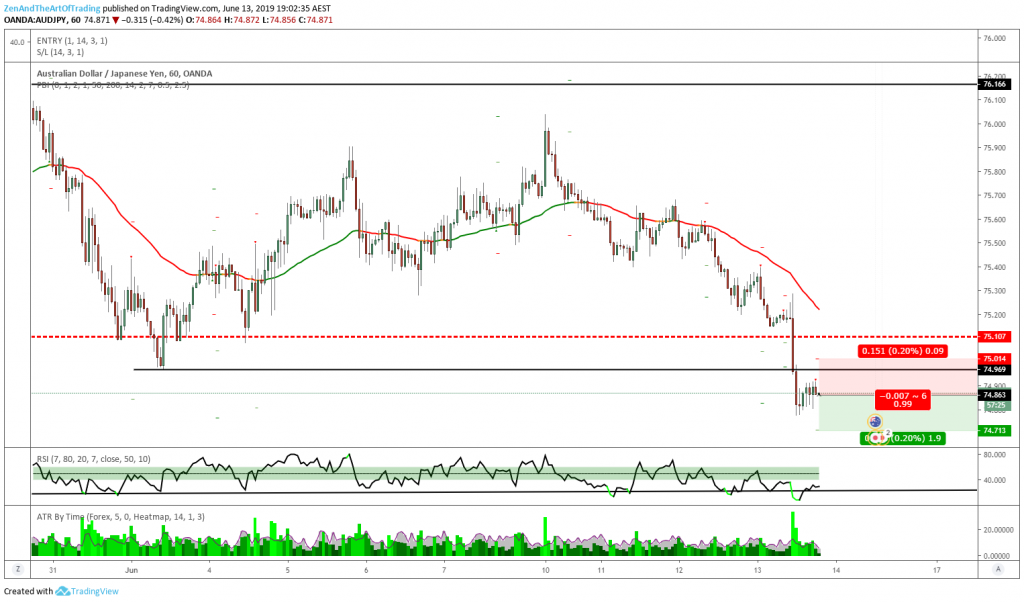
Trade #100 – Before 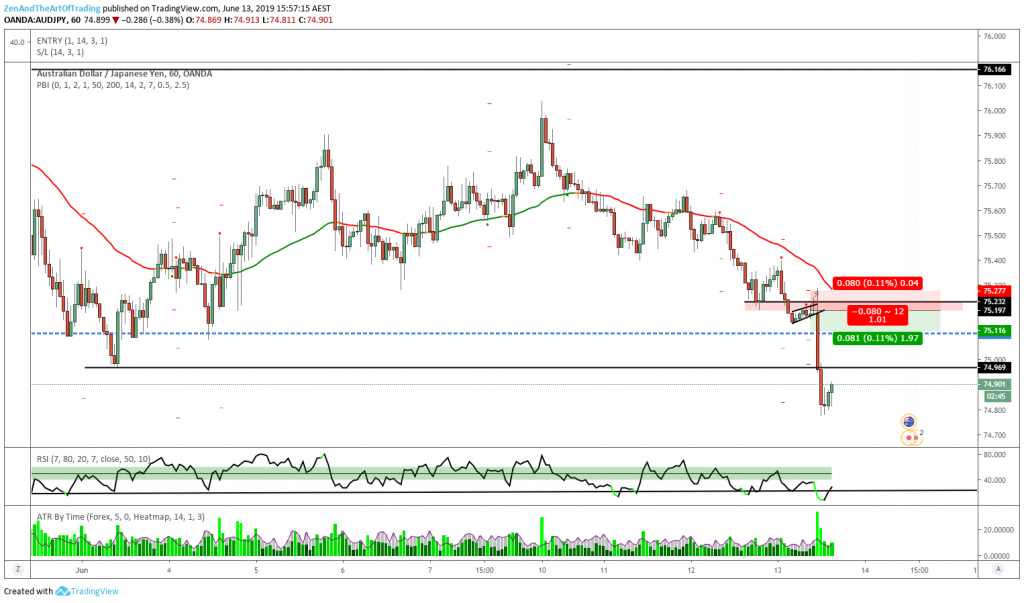
Trade #100 – After
Reflection:
This trade was a heartbreaker.
I did not get any trading opportunities this week until Thursday, and they all came at once. I took 5 trades on Thursday that all met my rules and this was the first of them.
Price had begun trending lower on this timeframe, and because there was no structure looking left until the blue line I decided to go short in anticipation of a move lower and potential trend-continuation on the Daily.
Price did in fact continue right through to the downside, but not before barely stopping me out for a loss.
Nothing could be done about this and I followed my rules to the letter, so this was still a Good Trade.
Trade #101
| Market | USD/CAD |
| Date & Time | 13/6/19 9:15 AM |
| Daily Trend | Bearish |
| Timeframe | 15M |
| Strategy | Pullback X |
| Result | -0.99% |
| Verdict | Good Trade |

Trade #101 – Before 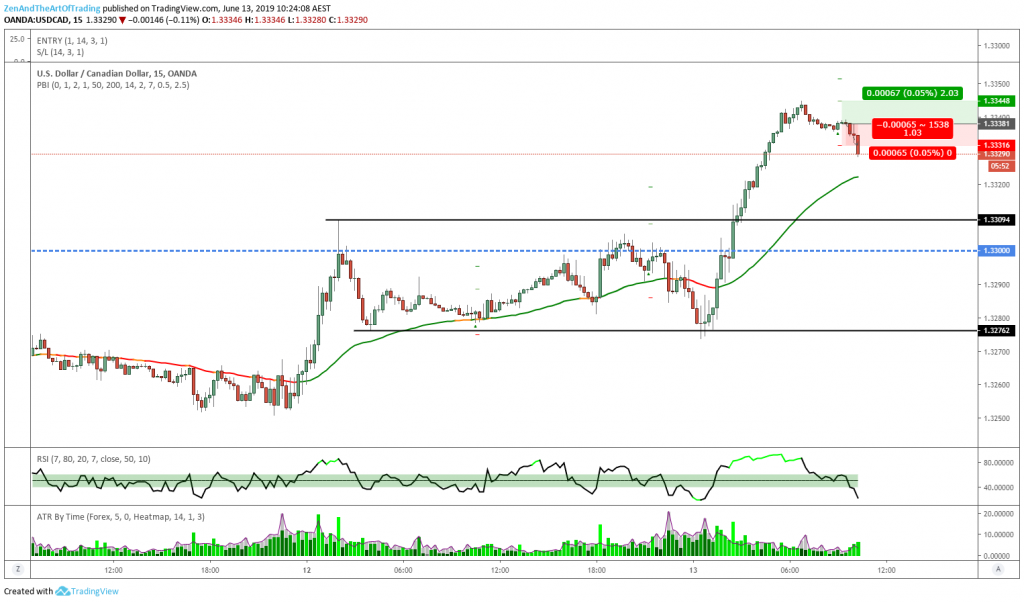
Trade #101 – After
Reflection:
As you can see, price had developed very strong bullish momentum on this timeframe. So even though the Daily chart was bearish, this trade met my rules as an intraday trade and so I went for it.
Unfortunately price began to form a flag pattern on the 1-hour chart, which meant my stop loss was taken out fairly quickly on this trade.
Price was admittedly very over-extended on this timeframe, but because my 1:1 position was at the high of the pullback, I decided this was worth the shot as quite often these moves end with a final blow-off top.
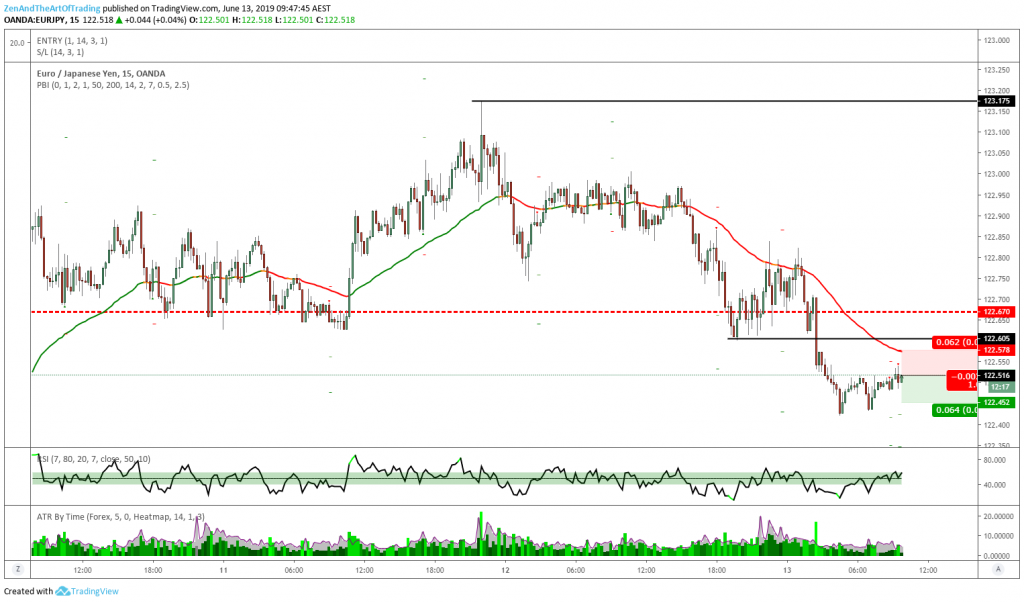
Trade #102
| Market | EUR/JPY |
| Date & Time | 13/6/19 9:45 AM |
| Daily Trend | Bearish |
| Timeframe | 15M |
| Strategy | Pullback X |
| Result | +4.18% |
| Verdict | Good Trade |
Trade #102 – Before 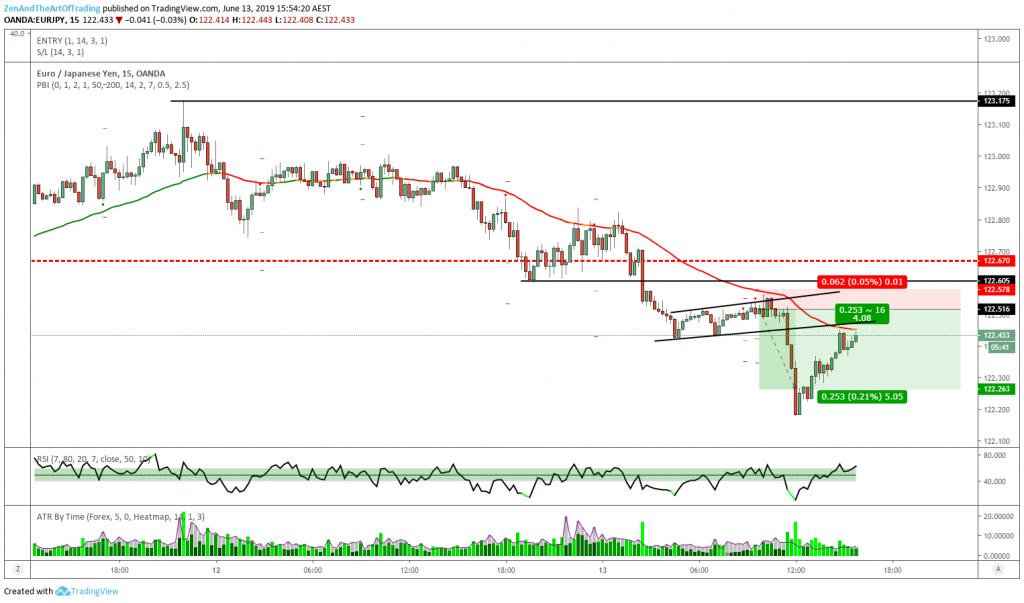
Trade #102 – After
Reflection:
My third trade within the first hour of the Asian session. This was a classic pullback setup below the 50 EMA after an impulsive move down that broke a significant support zone on multiple timeframes.
Price almost stopped me out, but then dropped like a stone into trend-continuation.
I was in the middle of a physiotherapy appointment when my exit alert was triggered, and I quickly grabbed my phone and closed the position for a +4.18% gain and then went on with my day.
This is the magic of trading: you can work from anywhere. Although I wouldn’t recommend it until you have some experience. It’s quite difficult to focus on trade management when you are distracted by day-to-day activities.
The only reason I can do it is because I have very strict and unambiguous rules for when I should exit my day trades.
Trade #103
| Market | USD/CAD |
| Date & Time | 13/6/19 1:00 PM |
| Daily Trend | Bearish |
| Timeframe | 1HR |
| Strategy | Pullback |
| Result | -1.00% |
| Verdict | Good Trade |
Trade #103 – Before 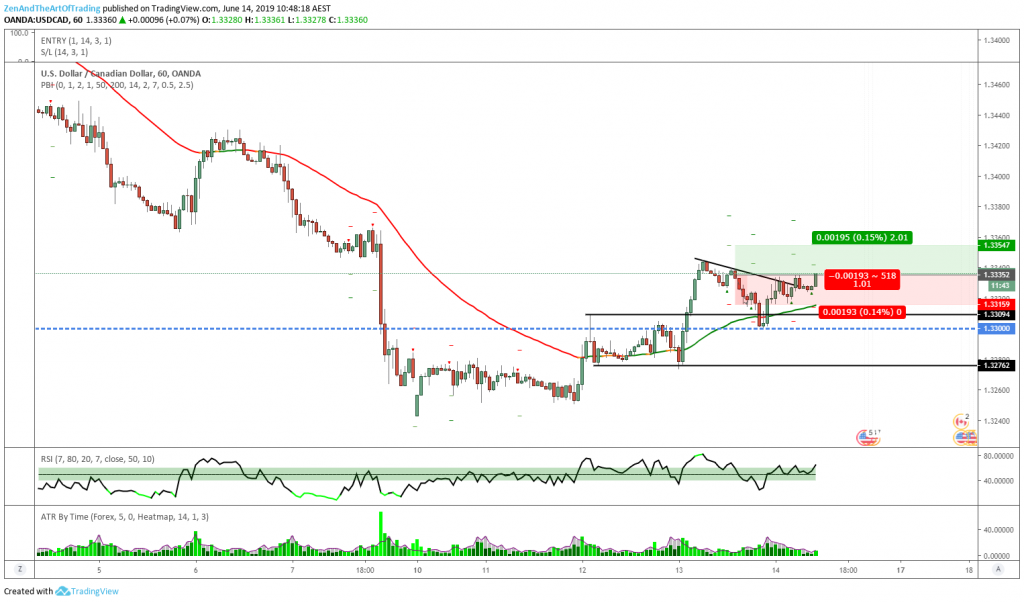
Trade #103 – After
Reflection:
After being stopped out earlier in the day on my 15M pullback setup I got a second opportunity to attempt to capture this reversal.
Unfortunately price stopped me out yet again, before heading higher. Yet again, I followed my trading plan rules, so this was a Good Trade regardless.
I have to admit it is still very frustrating whenever this happens. But because I manage my risk conservatively, it’s only mildly annoying and nothing to get too stressed or worried about.
This is a common occurrence for all trading strategies so sometimes you just have to suck it up, take the loss, forget about it and move on to the next opportunity.
If you followed your rules then there is nothing you can do about it. You did the right thing, but as traders, we aren’t rewarded for doing the right thing. We’re rewarded for doing the right thing consistently.
Trade #104
| Market | AUD/JPY |
| Date & Time | 13/6/19 7:00 PM |
| Daily Trend | Bearish |
| Timeframe | 1HR |
| Strategy | Pullback |
| Result | -1.02% |
| Verdict | Good Trade |
Trade #104 – Before 
Trade #104 – After
Reflection:
My fifth and final trade for Thursday: another failed attempt at capturing this trending move on AUD/JPY.
Similar to the previous USD/CAD trade (and my previous AUD/JPY trade), this trade stopped me out by just a few pips before the market continued in the direction I expected it to.
Once again, I followed my rules to the letter, so this was a Good Trade despite the fact that it lost. It’s lucky I caught that large winner on EUR/JPY earlier in the day or else this trading day would have been pretty rough.
Trade #105
| Market | EUR/JPY |
| Date & Time | 14/6/19 12:45 PM |
| Daily Trend | Bearish |
| Timeframe | 15M |
| Strategy | Pullback X |
| Result | B/E |
| Verdict | Good Trade |
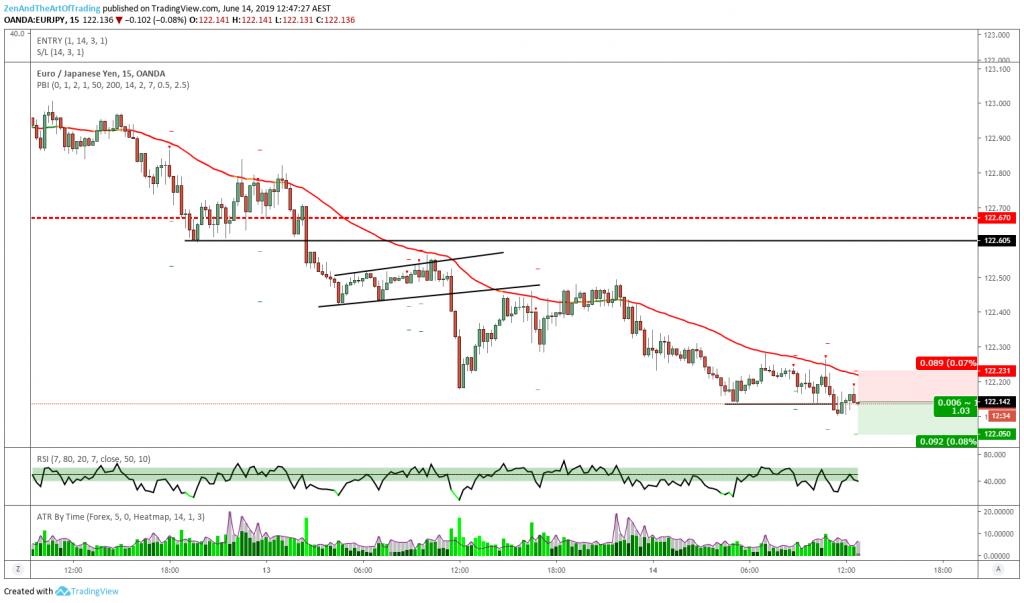
Trade #105 – Before 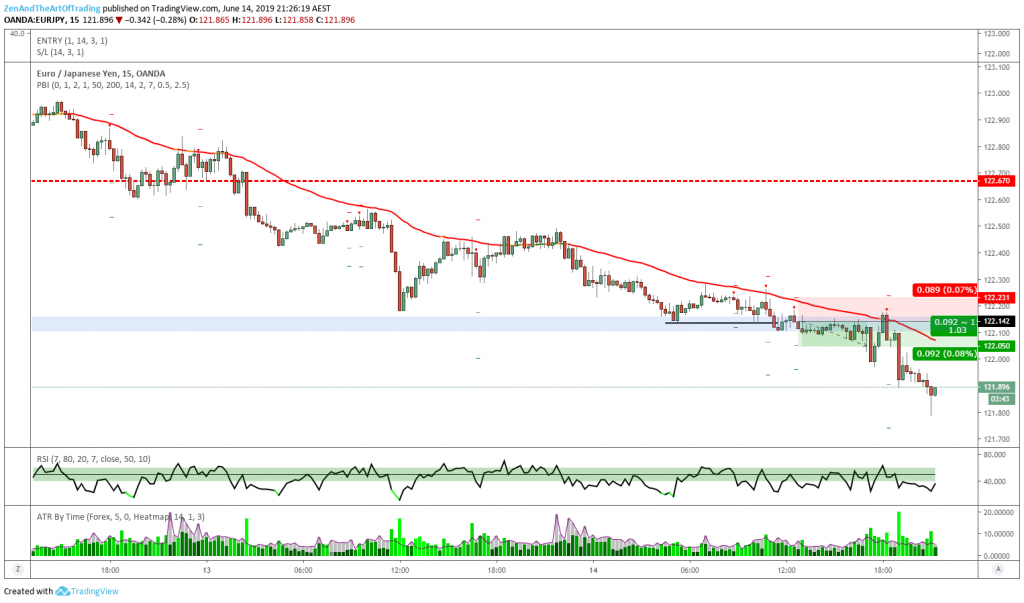
Trade #105 – After
Reflection:
Another 15M pullback trade on EUR/JPY.
Not much to say about this. The setup met my rules, but I didn’t notice until after I’d placed the trade that price was hovering around a major support level on the 4HR chart (the blue zone).
I still would have taken this trade because it still meets my rules on this timeframe and the Daily chart just reversed off a major resistance level in trend, but perhaps I would’ve not been so surprised by the lack of follow-through momentum.
I’m not sure why I didn’t take the next trading opportunity after being stopped out for break even on this setup. You can see that immediately after being stopped out on the retracement, price put in another bearish engulfing candle trend-continuation setup below the EMA.
It was getting late and I was exhausted from all the things I had to do during the week, so I wanted to go to bed. I was already involved in Trade #106 by this stage and I didn’t want two trades to manage on a Friday night past 11PM.
So I did not take it, and I missed out on another nice winning trade here. I would have had to wake up at 5AM to close the position, so I effectively sacrificed a winning trade for a weekend sleep-in – and to be honest, now that I am reflecting on my trading week on Saturday morning – I don’t think I made the right decision.
But hey – you can’t catch every single trade, and I’d already taken 7 trades this week (which is double my average) and I was being mindful not to over-trade. That’s what I’m telling myself to feel better about missing a valid winning trade anyway.
Trade #106
| Market | AUD/JPY |
| Date & Time | 14/6/19 4:00 PM |
| Daily Trend | Bearish |
| Timeframe | 1HR |
| Strategy | Pullback |
| Result | +0.51% |
| Verdict | Good Trade |
Trade #106 – Before 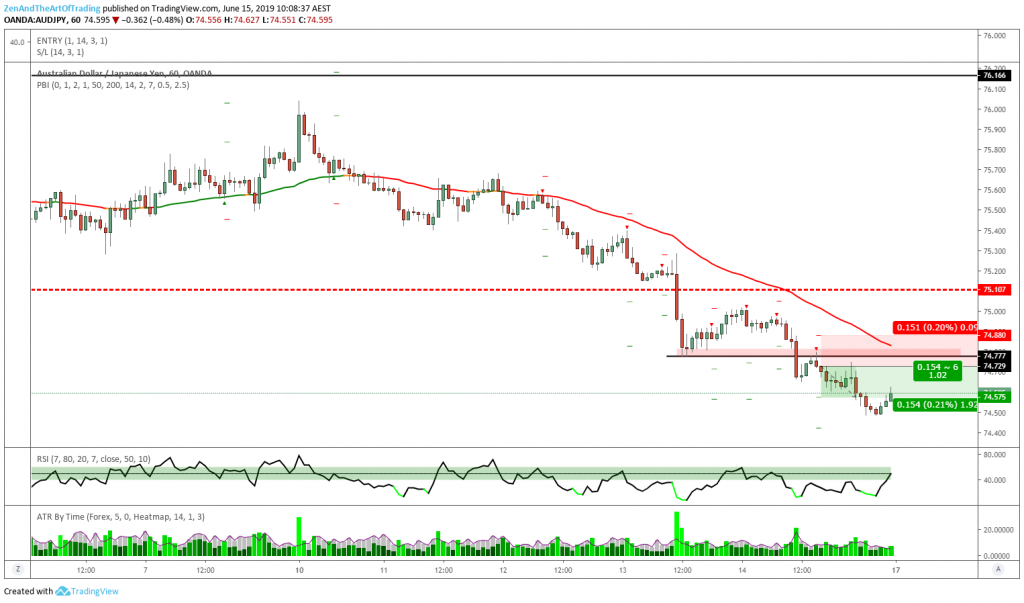
Trade #106 – During
Reflection:
Hallelujah! Finally, I caught a trend-continuation move on AUD/JPY. Third time’s the charm, as they say.
I am still involved in this trade. It’s not looking great, the bearish momentum has slowed. It would have been really nice to catch the initial move on the first AUD/JPY setup which had a much tighter stop size (and thus a larger position size and more profit potential).
Ah well, I followed my rules on every trade this week including this one so I can’t complain. I ended the week (and the month so far) pretty much break even, which is ok.
Every step that isn’t backwards is a step forward in trading.
Weekly Reflection
Monthly Return: +0.77% | Annual Return: +23.65%
Last Week’s Goal: Execute my plan flawlessly. Don’t over-trade.
Overall Grade: A
This week was another good grind. I was patient and at first I thought it was going to be a very quiet week, but then I got 5 trades all at once on the same day on Thursday.
Normally that would be a sign that I am over-trading, but this time I honestly tried to think of reasons not to take the 3rd and 4th and 5th trade of that day, but they all met my rules so I had no excuse not to take them.
Unfortunately most of them lost, but one of them made up for all of those losses, so it is a good thing that I did not hesitate to take all of the valid setups that met my rules.
I ended the week with an open-ended trade on AUD/JPY with a lot of room down to the next support zone, so all in all I feel this week was a solid trading week and I don’t think I could have done anything better.
I am aware that I need to work on my trading setup filters to better improve my ability to avoid taking trades that are “over-extended”, but it is taking me a long time to find an indicator or price action pattern that gives me an edge in that regard.
So for now I will continue to execute my plan as it stands, and I will keep on backtesting new strategies and variations of my existing strategies until I find improvements worth implementing.
So until next time, trade well, follow your plan, manage your risk, and thanks for following my journal. I hope that you find something interesting or valuable in these reflections.
Next Week’s Goal
Execute my plan flawlessly.
Previous Week’s Review
This Week’s Review
Myfxbook Stats

