Weekly Review #27
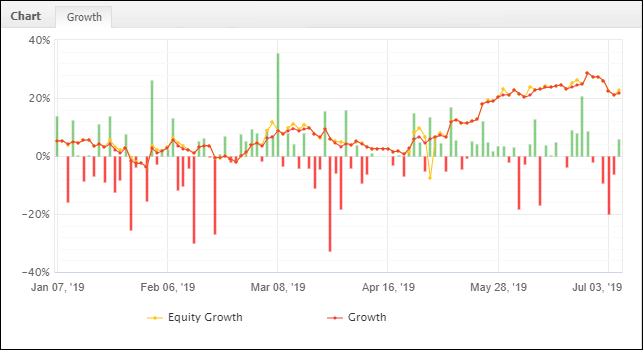
Table of Contents
Forex Trading Review – Week 27
This week was a rough one. I had seven valid trading opportunities and only one of them played out profitably. But I’d been expecting a drawdown to start for a while now as you can’t win trades forever, so it’s not a shock to me.
Trading is a game of probabilities, and anything can happen. In May I had eight winning trades in a row. This month I’ve started off with five losing trades in a row.
Winning and losing streaks happen, so although it’s disappointing, all I can do is continue to execute my plan consistently and wait for the probabilities to begin playing out in my favor again.
1st July – 5th July
Trade #116
| Market | USD/CAD |
| Date & Time | 2/7/19 10:00 AM |
| Daily Trend | Bearish |
| Timeframe | 1HR |
| Strategy | Pullback |
| Result | -1.01% |
| Verdict | Good Trade |
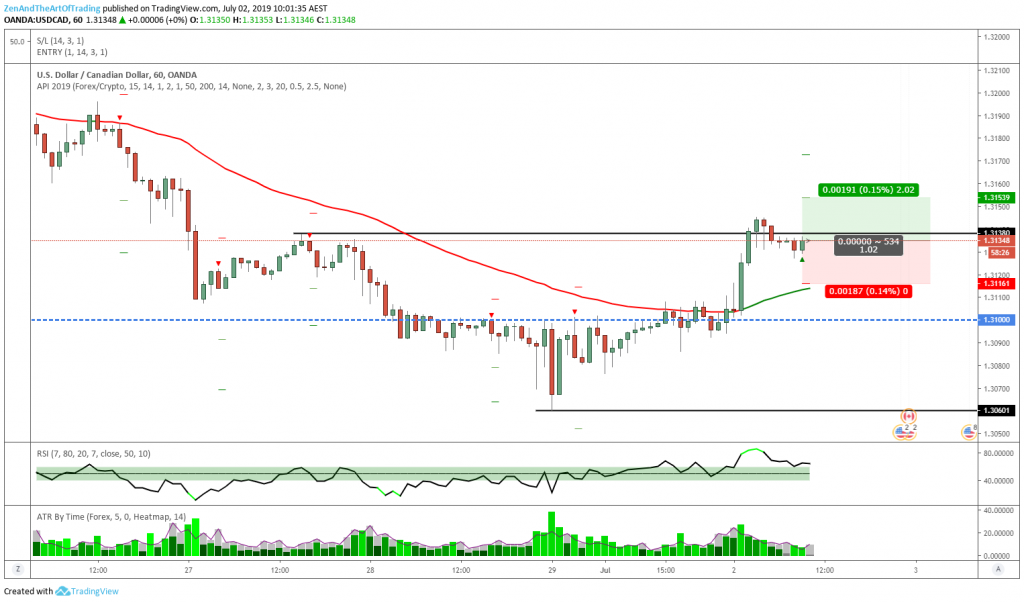
Trade #116 – Before 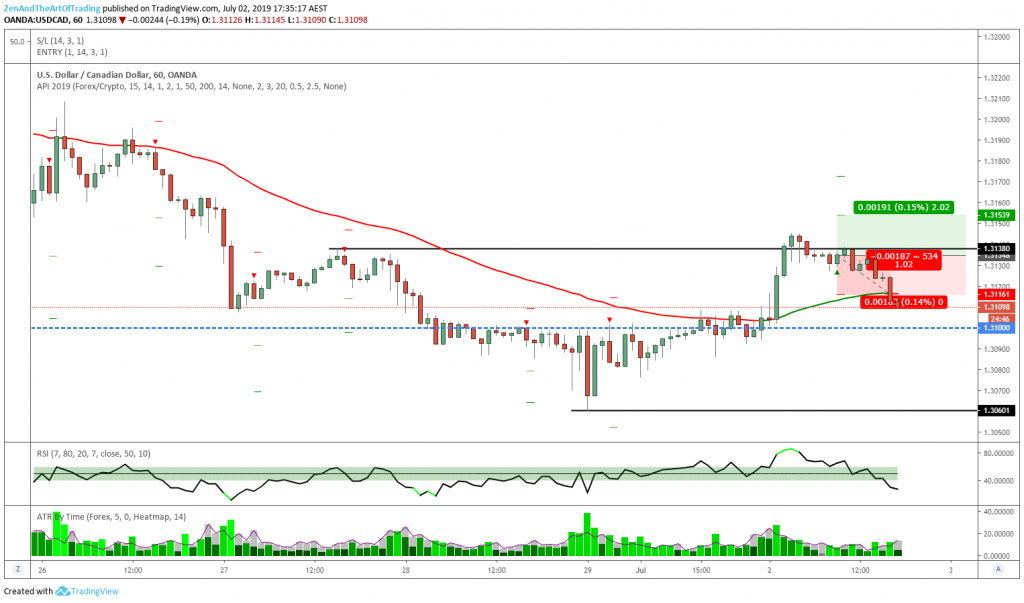
Trade #116 – After
Reflection:
I saw this as a potential reversal trade after the strong bounce off that key Daily structure zone at 1.31. But instead price made a false breakout and fell back within the range, stopping me out.
Good trade nonetheless. This pattern has the highest success rate of all the patterns I trade, so I’d take it 100 times out of 100.
Trade #117
| Market | EUR/JPY |
| Date & Time | 2/7/19 10:30 AM |
| Daily Trend | Consolidation |
| Timeframe | 15M |
| Strategy | Pullback X |
| Result | B/E |
| Verdict | Good Trade |
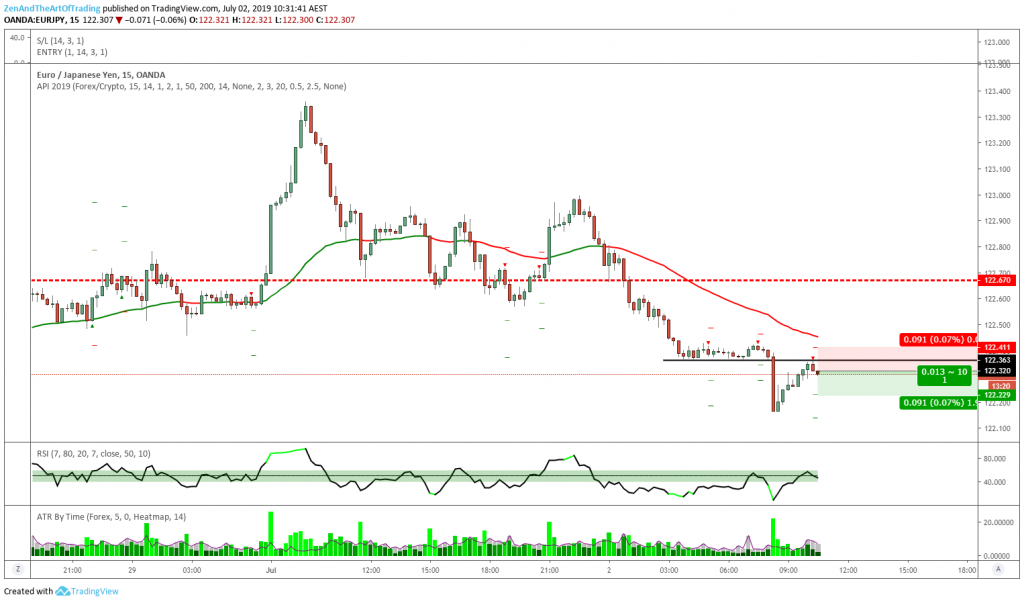
Trade #117 – After 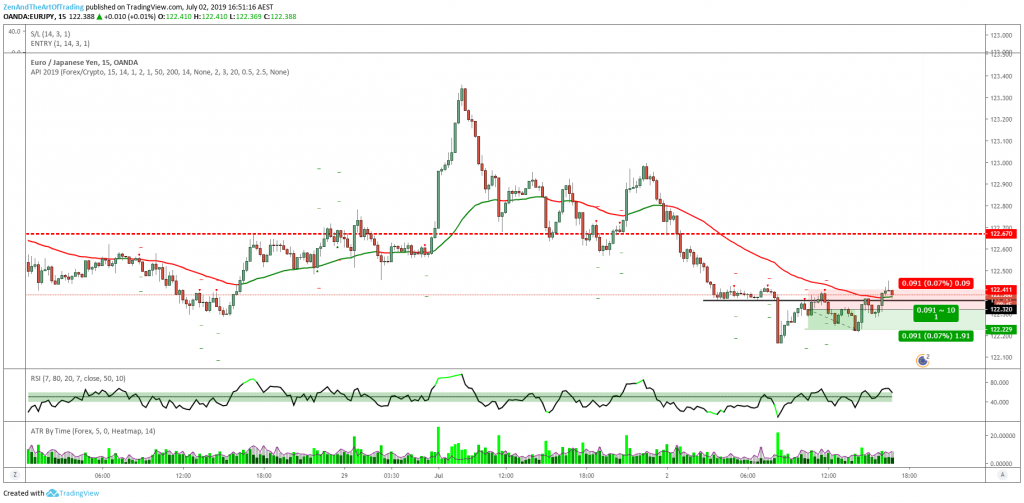
Trade #117 – Before
Reflection:
Another high-probability setup that unfortunately did not play out.
Price was making lower highs and lower lows and had just broken down hard out of a consolidation pattern below the 50-EMA. I went short when price put in a bearish engulfing candle within that minor structure zone.
But no dice. According to my rules, I was able to move my stop to break-even at 1:1 just before price reclaimed the 50-EMA, so at least I was able to avoid a loss on this trade.
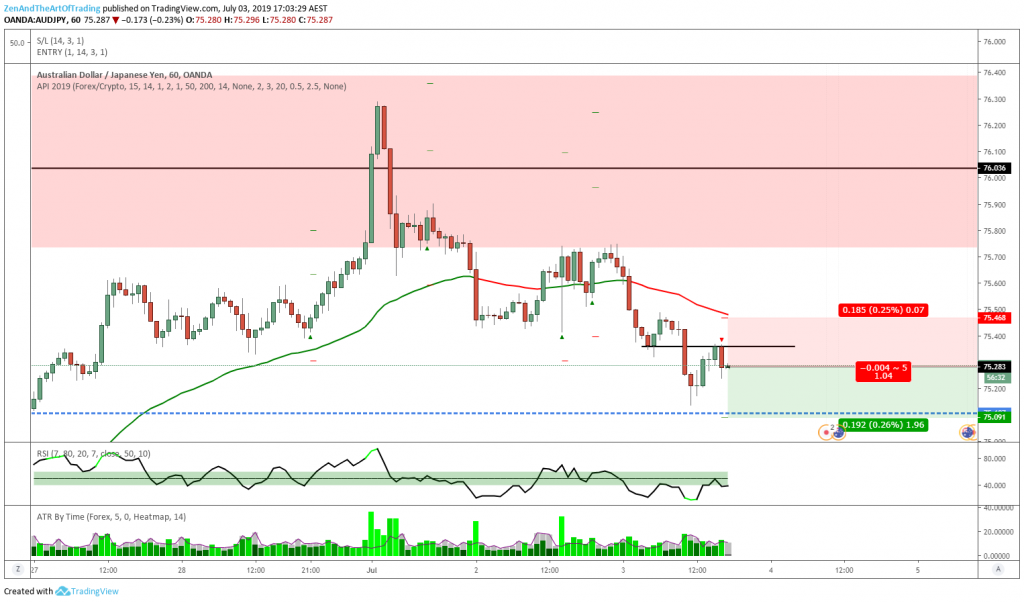
Trade #118
| Market | AUD/JPY |
| Date & Time | 3/7/19 5:00 PM |
| Daily Trend | Bearish |
| Timeframe | 1HR |
| Strategy | Pullback |
| Result | -1.00% |
| Verdict | Good Trade |
Trade #118 – Before 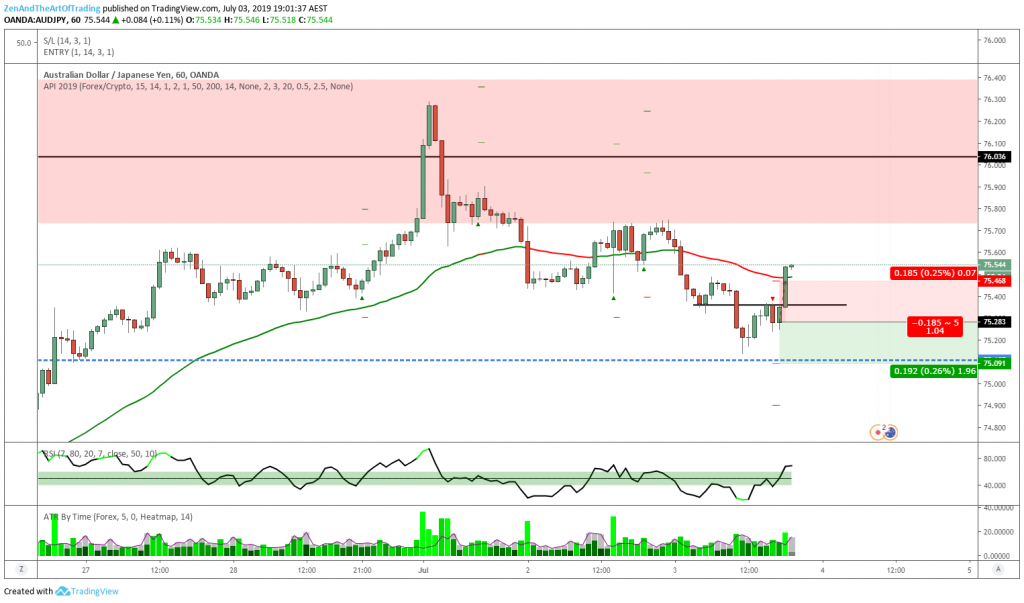
Trade #118 – After
Reflection:
This was perhaps a sub-optimal setup, given that price is so close to that Daily support zone at 75.100. However because price had not yet touched the zone I expected price to hit my first target before re-testing the Daily resistance zone up at 76.
Unfortunately despite the large rejection from that Daily resistance zone, the bulls regained control and kept this market moving higher, making this a loss.
I’m still collecting statistical data on these scenarios so it’s too soon to make any changes to my rules regarding this particular situation. But I have a feeling that I would be better off not taking setups like this in the future.
We’ll see what the numbers say during my next strategy review and backtesting round.
Trade #119
| Market | USD/JPY |
| Date & Time | 3/7/19 7:30 PM |
| Daily Trend | Bearish |
| Timeframe | 1HR |
| Strategy | Pullback |
| Result | -1.00% |
| Verdict | Good Trade |

Trade #119 – Before 
Trade #119 – After
Reflection:
This was a slightly better-looking setup than the AUD/JPY setup, but it still lost.
In hindsight I feel that I should have passed on the AUD/JPY trade altogether and entered this trade instead, but according to my rules I am allowed to have two correlated trades on at a time so I went for this setup too despite the fact that it was so similar to AUD/JPY (essentially doubling my risk on this trading idea to my maximum tolerance of 2%).
The main difference was that the Daily chart had a much cleaner down-trend on this pair, so I had slightly more conviction in this setup. Plus USD/JPY does not actually share a super strong correlation to AUD/JPY despite sharing the JPY quote, however on a slow week like this, I suspect the correlation is increased since the entire market becomes a little choppier.
In any case both setups lost, so I was wrong on this call. But both trades met my rules, so they were Good Trades nonetheless.
Trade #120
| Market | EUR/JPY |
| Date & Time | 3/7/19 7:30 PM |
| Daily Trend | Consolidation |
| Timeframe | 15M |
| Strategy | Pullback X |
| Result | -1.01% |
| Verdict | Good Trade |

Trade #120 – Before 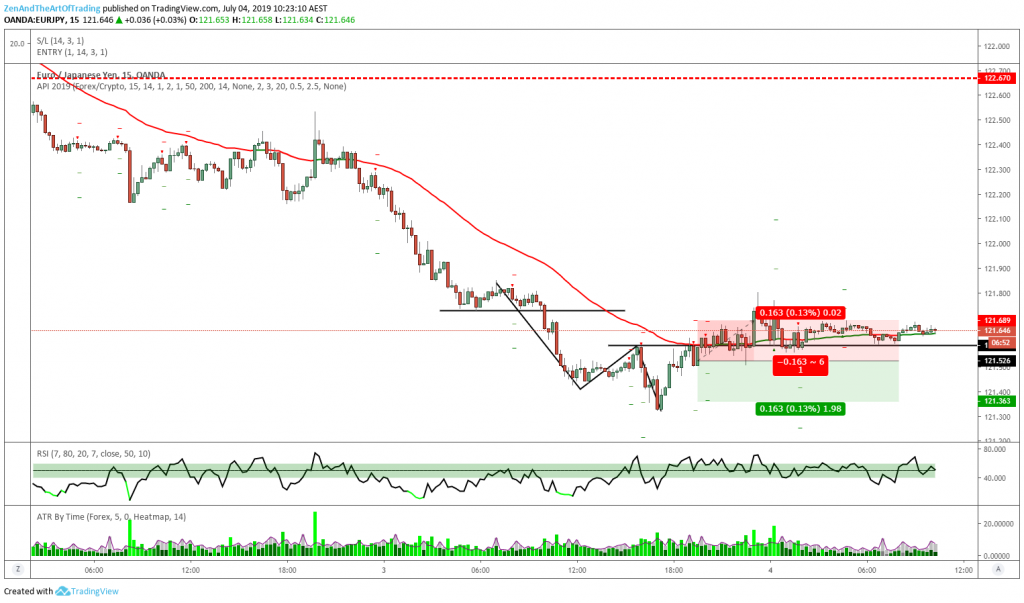
Trade #120 – After
Reflection:
JPY pairs were very unkind to me this week. Another loss on EUR/JPY this time.
Price was making lower highs and lower lows below the EMA after double-topping on the Daily. There was plenty of room to move lower to the next zone of major Daily support.
But price decided to chop around instead and go nowhere from here for the rest of the week, consolidating 50 pips above support. The markets tend to behave strangely during holiday periods such as America’s 4th of July. Maybe I shouldn’t trade during weeks like this.
Towards the end of the year or during my next quarterly review I will analyze my trading stats during holiday periods and see if it’s worth avoiding.
Trade #121
| Market | GBP/USD |
| Date & Time | 3/7/19 7:30 PM |
| Daily Trend | Bearish |
| Timeframe | 1HR |
| Strategy | Pullback |
| Result | +0.52% |
| Verdict | Good Trade |

Trade #121 – Before 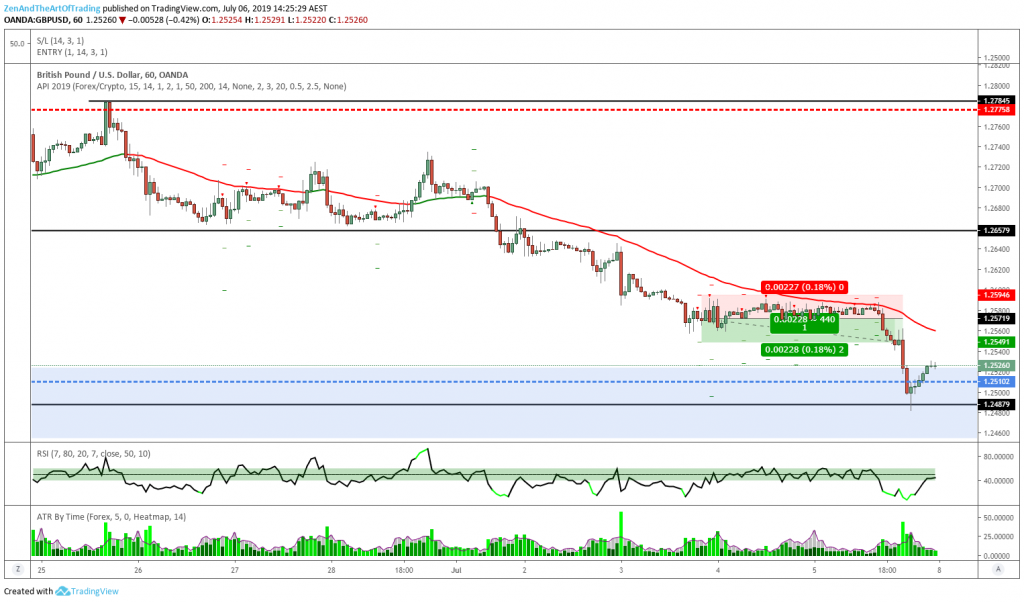
Trade #121 – During
Reflection:
Finally! A winning trade.
This trade took a few days to play out (which is unusual for 1-hour setups). But it played out profitably, so I’m not complaining.
Price is now testing a major Daily support zone and I will be watching next week for a reason to exit. Price has already put in a bullish engulfing candle on the 4HR charts which has me concerned that there will be a large retracement from here.
If I get a double-bottom on the 1HR next week I will consider exiting my second target. Until then my stop is at break-even and I will trail it below any structure that forms next week (assuming we enter trend-continuation lower, which I think is unlikely).
Trade #122
| Market | AUD/JPY |
| Date & Time | 4/7/19 10:00 AM |
| Daily Trend | Bearish |
| Timeframe | 1HR |
| Strategy | Pullback |
| Result | -1.01% |
| Verdict | Good Trade |

Trade #122 – Before 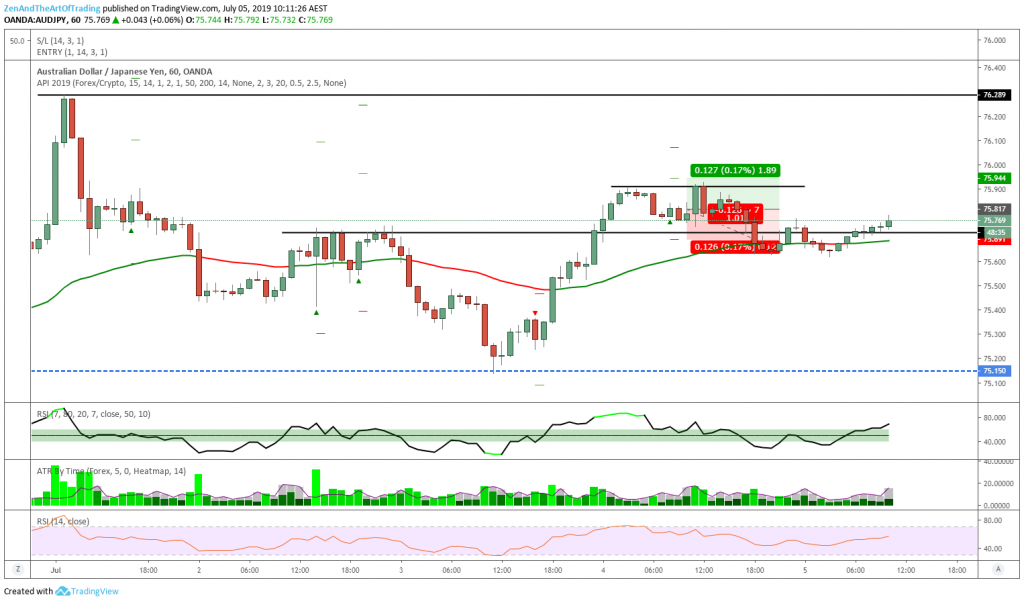
Trade #122 – After
Reflection:
This was another setup that I perhaps could have used discretion to ignore considering the poor performance of JPY pairs this week, but this setup met my rules and I am focused on being a disciplined systematic trader above all else, so I jumped back on the horse and pulled the trigger.
After price broke back above the 50-EMA and took out the nearest minor resistance zone I anticipated price moving higher to re-test the highs of this range.
Unfortunately, price went nowhere for the rest of the week and stopped me out yet again. Given the fact that the Daily chart is technically bearish and price is hovering around the highs of previous-resistance-in-trend, going long here within both a major and minor consolidation zone is probably not the wisest trading decision.
However, according to my backtesting this setup still has above a 50% chance of success, so I consider it a Good Trade according to my current systematic rules.
Weekly Reflection
Annual Return: +21.70% | Drawdown: -5.36%
Last Week’s Goal: Execute my plan flawlessly.
Overall Grade: B
In hindsight, despite the fact that all of these trades met my trading plan rules, given that this was an extremely slow week for the markets due to the 4th of July holiday in America, I think I may have over-traded this week. That is why I give myself a B.
There were at least 2 trades I took this week that I could have passed on given the fact that markets were so slow. But technically speaking, all these trades met my rules, so I don’t want to beat myself up too bad.
It’s easy to regret your decisions after the fact, but taking these setups gives me a positive expectancy, so I did the right thing by taking them and I will continue to take them like usual until I trade out of this drawdown. But during particularly slow weeks like this I feel I ought to use my discretion and experience as a trader to be much more selective in the trades I take.
However I just finished my most recent quarterly review and I am happy with how my strategy has been performing over the last 3 months, so I don’t see any reason to change anything just yet.
All that is left to do is keep trading consistently and reassess in another 3 months time and see if I notice anything that could be improved about my trading plan. So that is what I will do!
Thanks for reading, and good luck with your own trading.
Next Week’s Goal
Execute my plan flawlessly.
Previous Week’s Review
This Week’s Review
Myfxbook Stats

